How To Make Your Own Bunting
13th October, 2023
Greetings! It’s me, Camilla aka @she_sew_fabulous and I’m back again with another tutorial for a great beginner friendly project, that staple of English fetes and cosy cottage core alike: How To Make Your Own Bunting!
In this blog post, I’m going to show you the basics of getting started and then you can adapt to suit.
There’s no hard and fast rule about the size of the triangles, the colour co-ordinations, even the spacing of the flags, you really do have limitless creative possibilities, which is why it’s such a fun project to work on.
Bunting is a great way of using up scrap fabrics and adds a lovely, handmade touch to any room.
It’s also very straightforward to put together, making it a great newbie project when you’re getting used to how everything on your sewing machine works.
Once you get more confident at sewing, you can try your hand at making your own bias binding, or even putting small scraps together to make patchwork designs on your triangles. The possibilities are endless!
How To Make Your Own Bunting

Fabric Requirements
- Fabric (I estimate approximately 50cm of fabric for every 4 flags, but this will vary depending on the size of flags and whether or not it uses a directional print). For this make, I’ve used four different designs, 2 x plain and 2 x patterned, but the colour co-ordinations are up to you).
- Scissors
- Co-ordinating thread
- Double fold bias binding (either pre-made, or you can make your own. I always use pre-made as I’m not very good at making it myself, but there are plenty of tutorials available if you want to give it a go!)
- Card or paper
- Ruler
- Fabric markers or chalk
- Pins or clips
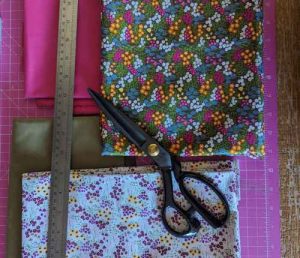
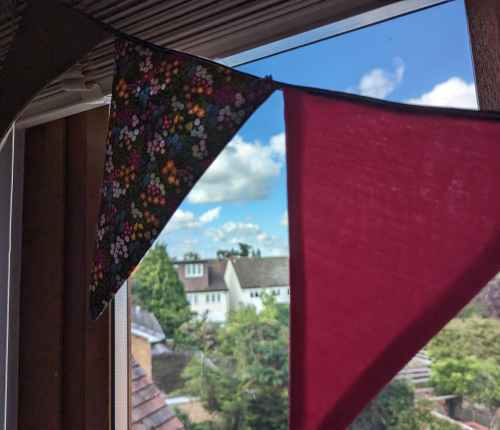
As you can see, my fabrics this time are lovely, autumnal colours, perfect for the changing seasons!
These are cotton, but bunting will work with any fabric, as long as it’s not too thin. If you’re making it to hang outdoors, consider using a waterproof fabric (like the one I used in a previous blog on how to make a waterproof tote bag) so that it doesn’t get damaged by the weather.
Once you’ve assembled your supplies, the first thing you need to do is create a template for your flags. I make this out of thick card so that it’s sturdy and I won’t accidentally chop through it, but you may prefer paper so that you can pin it to your fabric.
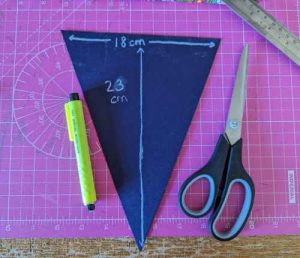
Step 1 – Creating the Triangle
Create a triangle that’s 18cm wide and 23cm high.
This is achieved by measuring an 18cm line, marking the midpoint (9cm) and then drawing straight up for 23cm.
Join the edges of the 18cm line to the top of the 23cm line and you have a triangle!
Cut it out using scissors (not your fabric scissors of course, regular scissors will be just fine for this!).
Flags of this size will yield a bunting where every 4 flags is around 60cm in length.
Step 2 – Folding the Fabric
Fold your fabric in half selvedge to selvedge and place your template onto the fabric.
If it’s a thick card one, like mine, hold it down with pattern weights and carefully cut around it.
You want to create two triangles that can be stitched together on the diagonal edges to make a flag, so they need to match.
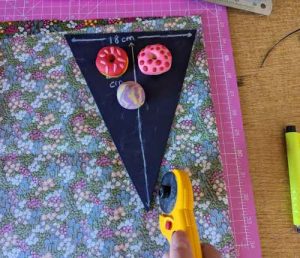
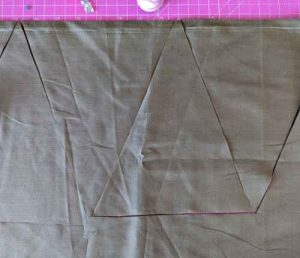
Step 3 – Cutting the Triangle
If you’re using a plan or non-directional fabric, you can flip the triangle upside down in order to use less fabric, however please note that if your fabric print is directional, this will not work as the print will then be upside down.
This is also the reason why you need to fold the fabric selvedge to selvedge and not any other way, as otherwise you’ll be flipping the design.
It’s up to you whether you cut one at a time, or mark and cut several at once.
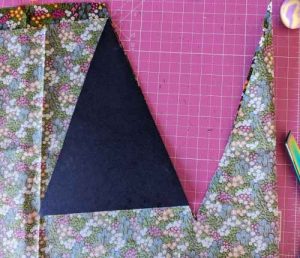
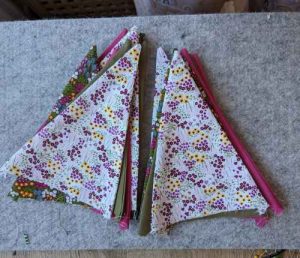
Step 4 – Ready to Sew
I’ve used 4 triangles of each fabric, as you can see and because my fabric was folded, I’ve ended up with 16 x pairs of triangles, which are pinned together right-sides facing and ready to sew.

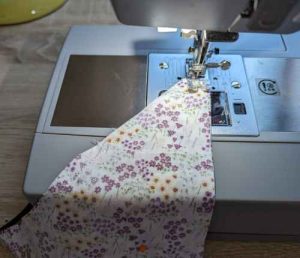
Step 5 – Sewing the Triangles
The sewing itself is really easy, as they’re all straight lines.
I allow a very narrow seam allowance by lining up the edge of the fabric with the edge of the foot.
I don’t want lots of extra fabric and bulk inside, so this works really well.
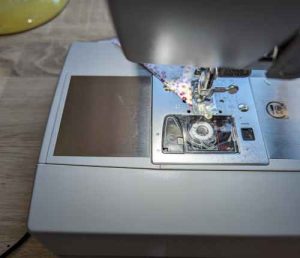
Sew straight down and when you get to the point, lower the needle and pivot the fabric around to go up the other side, so that you get a continuous, neat straight line. You only need to sew the diagonal edges, not the top.
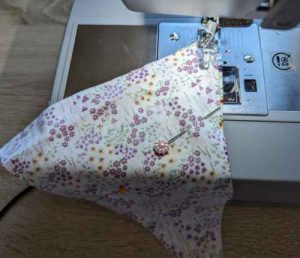
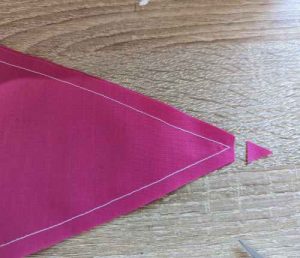
Step 6 – Chop Off the Tip
Once sewn, you need to chop off the very tip, being careful not to chop through your stitches.
This is to ensure a nice pointed corner when you turn them the right side up, as excessive fabric will prevent this from happening.
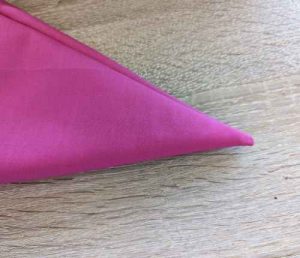
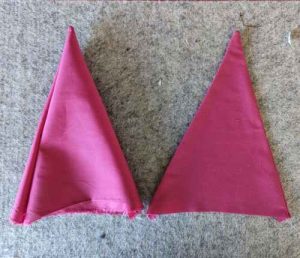
Step 7 – Iron the Triangles
Once turned, iron the triangles so that they’re nicely pressed together. You can see here the difference between an unpressed one (the first image) and a pressed one.
Step 8 – Attaching the Triangles
Once all your triangles are ironed, you’re onto the fiddlest bit of the process, which is attaching the triangles to the biased binding.
The first thing you need to do is measure a length on the end of the binding, which will be left empty and used for typing the bunting onto things.
I’ve left a length of 50cm here, but you may want more or less depending on how you’re hanging.
I’d rather have extra than not enough, so I find 50cm works well. Mark the 50cm point with a pin, so that you know where to attach your first flag.
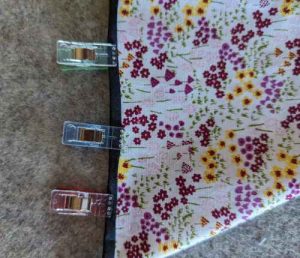
Step 9 – Sandwiching the Unsewn Triangles
Next is the tricky bit, which involves sandwiching the unsewn top of the triangles in between the folds of the bunting.
The trick here is not to rush and use as many clips (or pins if you prefer) as you’d like.
I prefer clips as they hold the fabric in place better, but it’s personal preference.
It’s important to note that if you don’t catch the flag in between, it’s going to fall out and look messy, so take your time with this stage.
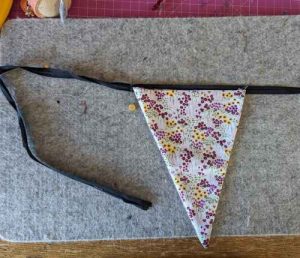
Step 10 – Finishing it
I’ve found that attaching three flags, sewing them and then attaching three more is the optimum here.
Sewing one at a time is too laborious, but trying to attach more sometimes leads to them sliding down during the sewing process, meaning you have to re-clip them. You can see here a sewn on flag and then two clipped ones waiting to be sewn.
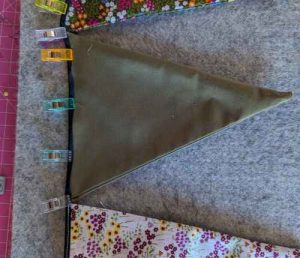
You’ll also notice that I’ve positioned my flag directly next to one another to ensure they’re even.
For me, trying to set them the same distance apart from one another is too fiddly and leaves too much room for error, but if you’d like to experiment, then feel free!
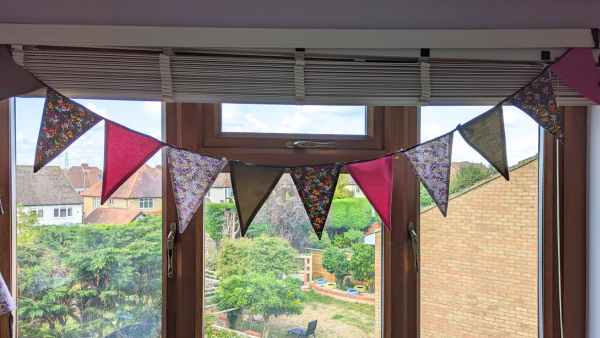
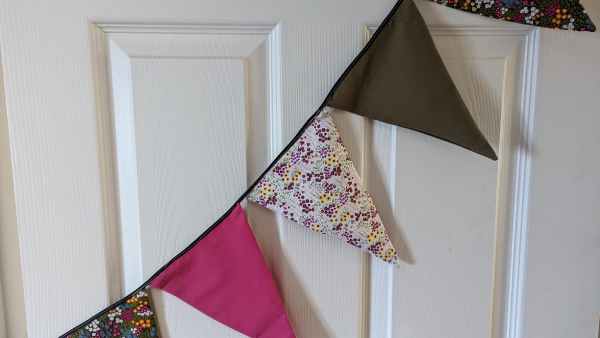
Once you’ve sewn your flags onto the bunting (and left another 50cm free at the other end) you’re all done! The only thing left is to find somewhere to hang them.
If you make one, please tag @she_sew_fabulous and @ukfabricsonline on Instagram!
Tutorial created by Camilla (@she_sew_fabulous) for UK Fabrics Online.
Visit us at UK Fabrics Online to check our Printed Waterproof range!
If you have any questions, email us or leave a comment here.
Hope you enjoy this one.
Thank you!
Leave a Reply